My Outdoor Chilli Plant Isn’t Growing!

About 3 weeks ago I wrote a piece on moving chilli plants outdoors. It is often difficult to judge when it is OK to do it, and it is always a compromise, it is where I live anyway.

So I thought I’d update people as to what my plants are up to. Generally, I keep all mine in the greenhouse until they grow so big I have no choice, and if any go outside I’m always picky and try to keep the best ones under glass.

This time, just as an experiment I planted one outside on our patio in a stone pot to see what happens. I did this much earlier than I would normally do, but in doing so I was mimicking the dilema which most chilli growers that don’t have a greenhouse. I also put one in a raised bed, and kept the others from the same batch inside.

And after about 3 weeks, here are some results.

2016-05-31-15.42.41.jpg.jpeg

The outdoor plant has had some pretty good weather, not perfect, but OK. It has had warm days and cool nights to start with, some rain, a fair bit of wind, and not too much in the way of pest damage, just a couple of nibbled leaves as you can see. But this has still taken its toll, down to 8°c on some nights, some cool winds and a max of maybe 23°c in the day times isn’t ideal. The leaves are curled and quite tough, but mainly the plant has grown slowly, maybe 20cm high and hardly branched out with not many extra leaves, though it is starting to flower.

I stress that this plant hasn’t been neglected at all, it has beeb watered whenever it needed it, fed, staked, and moved about to shelter it from the worst of any wind.

2016-05-31-15.41.53.jpg.jpeg

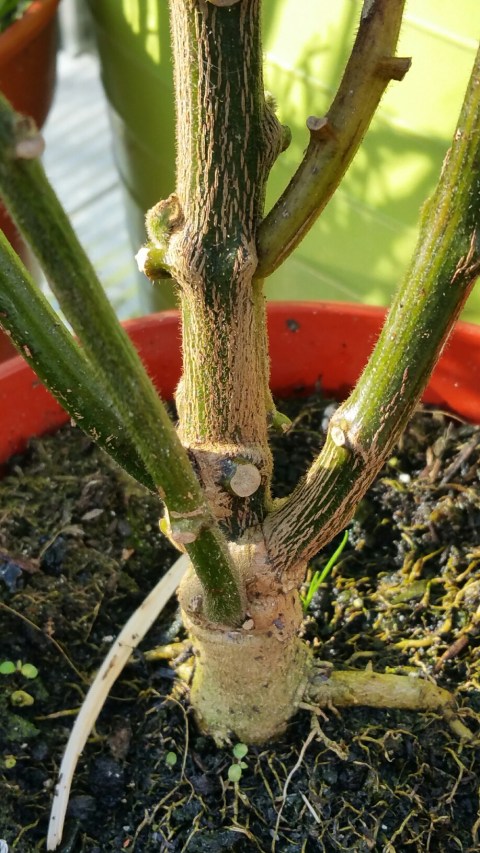
The one in the raised bed (above), has fared better. The leaves have toughened, but not curled much, it has more side shoots and the flowers are more developed. This is because it has been protected from the elements with green mesh around and over the bed too stop the wind and raise the temperature, the soil temperature is warmer and more stable too.

2016-05-31-15.41.12.jpg.jpeg

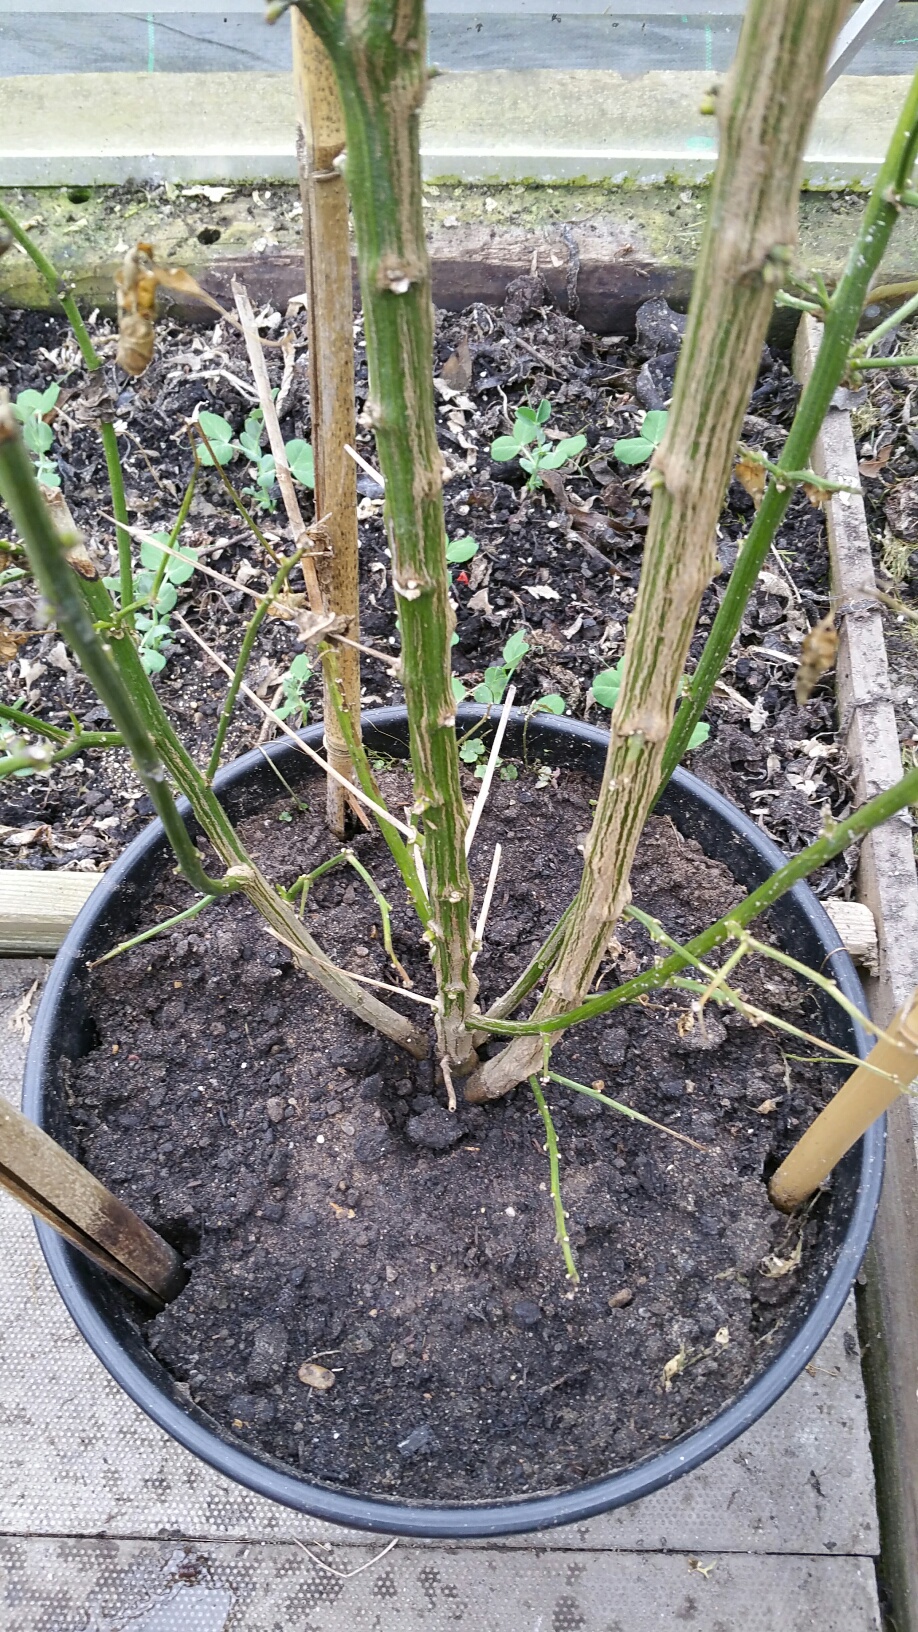
The third one (above), has been kept in the greenhouse all the time, and has grown a lot more. It is taller and probably has twice the amount of foliage than the outdoor one, there are more side shoots, more flower buds and it is looking generally more healthy.

All these plants are the same variety, grown alongside each other until they were separated for this experiment. They are a variety called Nigel’s Outdoors, not one I have grown before, nor one I am familiar with. The seeds came to me as part of a swap I did with Alex the Air-Pot Gardener, a friendly chilli grower here in the UK. I assume it has been bred, (no doubt by someone called Nigel), to be more tolerant to the conditions of my experiment. Other varieties may not have fared even as well as this one. I suspect a similar experiment with habanero plants would have resulted in the outdoor plants not growing at all.

So what is the lesson here?

  • In temperate climates keep your chilli plants indoors for as long as you can, it will pay dividends.
  • Don’t expect too much from your chilli plant if you put it outdoors before the warm summer nights and while it is still young and tender.
  • The outdoor plant won’t grow as quickly and you won’t get as much of a crop.

Watch this space for another update in a few weeks. I suspect we might be picking fruit of the one in the greenhouse.


When can my chilli plants go outside?

Let’s be honest, unless you live in a Mediterranean or tropical climate, you will, like me and millions of other chilli growers, be looking to put plants outdoors as soon as you can because your window, conservatory, polytunnel, or whatever, is never big enough to house all of your chili plants. It is never big enough because we always grow too much, it’s a bad habit.

I grow too much, I don’t need as many as I grow, I give them away, which brings me joy, but still I end up with an overflowing greenhouse and want to move them out into the elements as soon as I can.

So… When is it safe to do it and what special care should you take?

Remember, especially it the UK, it is always a compromise, they will never do as well as they would in the shelter of a greenhouse, but follow these guidelines to give your plants the best chance possible.

1/ My book has loads about temperatures, but just to summarise – If they go below about 18°c they won’t grow (some need even higher temperatures). You needn’t worry about them getting too hot. Even UK record high temperatures will make them jump for joy. Look at the forecast and judge accordingly, they can go cooler at night, but keep an eye on both daytime and night-time temperatures. For me this is, and it is the same most years, about the beginning of May through to early September.

2/ Think about bringing them indoors at night or in cold weather. They will benefit from this protection. It doesn’t matter if you put them in a dark corner, or even a garage, it is night time anyway.

3/ Try and only move established plants outside. Pot on your seedlings into their big pots but let them get established before they go outside. Tender small plants are more likely to get bashed by the wind and rain.

4/ Use big pots, these will keep moisture levels more balanced in drying winds and when the plants get bigger they won’t blow over. They also store heat during the daytime which keeps the roots warm at night.

4/ Protect them from the elements – Put them in sheltered warm spots, try and shelter them from wind as much as possible with trellis or other plants, anything to stop them being bashed.

5/ Stake the plants – Wind causes so many problems, in particular the constant swaying movement which loosens the stem at the base and tears at the roots. Also, use small sticks to support branches when the plants get bigger. Wind is your enemy.

6/ Don’t assume that rain is enough to keep them watered. I can’t emphasise this enough. Think about when you water a plant, you probably give it about 1/2 an inch at least. Very rarely do we have that amount of rain in the summer, especially on a daily basis. A light shower will get the surface wet, but it won’t reach the roots. Also, when they are kept against a wall they may be in a ‘rain shadow’; everything else nearby gets wet, but they get nothing.

7/ Too much rain can be a problem too. During we periods remove any trays from beneath pots so they aren’t sitting in water. If there is a storm forecast, then try and bring them into somewhere sheltered.

8/ Keep feeding them! Outside plants need all the help they can get, and regular feeding will keep the roots healthy and help them withstand the drying effects of wind. Use chilli plant feed or standard tomato feed.

A Miserable Chilli Plant

A fairly miserable, poorly fed and bashed chilli plant. (A deliberate experiment!)

8/ Move pots around regularly to search for slugs and snails hidden beneath. Look in the holes in the bottom of pots too. For small plants particularly this will be the biggest and most immediate threat the their existence.

9/ Holidays – If you entrust their care to a neighbour and you only have a few plants, they might get better care if you carry them round to their garden rather than making the neighbour come to you. Reward your neighbour with plenty of chillies, they might get hooked too. Alternatively consider planting them in a self watering system, more expensive, but at least it guarantees they are watered and fed for up to 2 weeks while you are away.

10/ Choose the right varieties – Be realistic, habaneros, scotch bonnets, and most of the super hot chillies need higher temperatures than our climate will give, and a longer growing season too, they really won’t do well outside unless you wait till they are fully grown, and you might not have the space for that. Stick to varieties that grow quickly or withstand harsher weather, Hungarian Wax are picked early, Bulgarian Carrot are very tough, and reasonably hot, Aji (Capsicum baccatum) varieties are also very resilient, with woody stems and small leaves. Apache F1 is nearly always foolproof as it is so quick and also compact, or for something hot and brightly coloured try Twilight.

Chilli Seedlings - From the book 'Growing Chillies'

How cold will my chilli plants go?

We had some unseasonably cold weather in the UK recently, and where I live near the south coast of Devon frosts at the end of April are almost unheard of. But we had some all the same, and it caused a few problems. For me it wasn’t so much the night time lows, but the general cold, when the sun wasn’t out greenhouse temperatures during the day were too cool for plants to grow quickly, so everything is behind.

There were a few touch and go nights though, and towards the end of April I had just too many plants to bring indoors, so they had to run the gauntlet of some near freezing temperatures.

The lowest my max/min thermometer read was -1°c in the greenhouse, but don’t take this as definite. Have you ever browsed the range of thermometers available in a garden centre? Have a close look, last time I bought one the readings on all the thermometers on offer ranged from 18 to 21°c, and they were all hanging from the same shelf! I bought an average one, but there is no telling how accurate it really is. I suspect the temperature didn’t quite reach as low as -1°c, or if it did it wasn’t for very long, maybe only 15 minutes before dawn.

So did my plants survive? Yes, they all did, (not so the courgettes planted outside). And what does this tell us about the lowest temperatures young chilli plants can endure?

My experience tells me that as long as there is no cold wind or rain blowing directly against the plants, which means they need to be in a greenhouse not outdoors, and as long as the cold temperatures only go on for an hour or two, then the air temperature can go down to just 2 or 3°c and still recover happily, but who wants to gamble on a couple of degrees this way or that? And remember this is far from desirable, they aren’t actually growing at these temperatures, as they would if they were bottoming out at 19°c, so warmer is always better.

Another factor that can seriously jeapordise the well being of small tender plants is how quickly they warm up. Generally the soil in their posts will retain a little heat to insulate the roots. The plant might wilt slightly when it draws down fluids into the roots as a reaction against the cold. When the sun suddenly starts to warm the greenhouse then the wilting leaves can’t transpire quick enough to offset the rapidly increasing temperature and the drooping leaves shrivel. In the past I have seen chilli plants looking healthy before sun-up, but two hours later they have died. This is a particular problem where a greenhouse is sheltered from the rising sun and remains cold until later in the morning when suddenly the strong sun peeps over nearby buildings or trees and the temperature rises from nothing to 30°c in a matter of seconds, rather than a gradual warming as the sun rises. This is why instructions on constructing greenhouses always tell you to site it somewhere away from such situations.

Finally, of course, different varieties react differently, tepin, most Capsicum pubescens, (so rocoto), and many aji varieties will be slightly more tolerant than others.


8 tips on keeping your young chilli plants at the right temperature

One of the best things you can do to make sure your plants grow at optimum speed is to look after the temperature and try to give them constant warmth. In the spring time this can be difficult, but here are a few tips as to how you can do your best to keep temperatures high, and consistent.

Plants aren’t human, they don’t have feelings and moods. They are simply a load of chemicals jumbled together, and each type of plant has it’s own slightly different composition, which is why some like damp, some like dry, some like heat and some cold. High temperatures are a big part of what makes chilli plants grow, and when the temperature is right for them, they grow, and when it isn’t they don’t. Look at weeds in the hedgerows, one week nothing, next week a foot high. You want your chillies to go from an inch to a foot quickly, so let’s get the temperature right.

For optimum growth rates you should be aiming for a constant 27-31°c during the day, and slightly lower at night, say 23-26°c. At these temperatures your chilli plants will almost grow before your eyes, and maybe two or 3 times the rate of something kept at ‘room temperature’ with a bit of extra sunshine during the day.  Put simply, they will grow when the temperature is right, and stop when it isn’t, so any extra time or money you can spend on maximising this growing period will be rewarded with better results.

Chilli in black pots

  1. Firstly, and probably most importantly; remember, half the plant is roots, so soil temperature is at least as important as air temperature.
  2. A heated propagator – For germination and for young plants this is the easiest way to keep them warm. When they have germinated and are growing nicely, you can remove the lid and the warm tray will continue to keep the roots warm.
  3. Soil warming cable – For a larger number of plants, and if you can afford the luxury, then this is the best way of optimising soil temperatures to grow your plants as quickly as possible. It means you need a big sunny window if not a lovely greenhouse, with a big tray or specially constructed bench, a purpose bought warming cable, some insulation and some sand or inert substrate. Then you can thermostatically control the temperature of the roots of your plants accurately.
  4. Let sunshine get to the pot – When sunshine is hard to come by arrange your pots so they get the maximum benefit. If they are in a position where the side of the pot is exposed to direct sunlight, then the warming effects of the sun will mean the pot and therefore the roots are warmer than the surrounding air.
  5. Use black pots rather than the traditional red ones. These are often cheaper and they absorb the heat of the sun more.
  6. Bigger pots – there is no harm in potting small seedlings straight into their final big pots, the big volume of soil acts as a heat sink to keep roots warm long after the sun has disappeared. It also stops the big temperature fluctuations that small pots suffer from. Beware – if big pots are kept in a cold place and never get a chance to warm up, then the opposite will happen.
  7. Move them around! – The simplest job is sometimes the hardest as it involves time and effort. Put them in the greenhouse or the sunny window during the day and move them into a warm room at night. The more you keep them at their optimum temperature, the more time they will spend growing.
  8. Hydroponics – This is a more expensive alternative than traditional pot growing, but once you have made the initial investment of time and money the rewards will be higher with quicker growing plants, bigger plants and ultimately more chillies. Depending on your setup, the root temperature, and possibly that of the whole plant, are thermostatically controlled. Top this with the perfect nutrient mix and you will be way ahead of the competition.

Remember there is more to it than just heat, you need to juggle all of these tips with lots of lovely bright light too.


I wish plant sellers would get it right

I wish plant growers would get it right. I saw this in my local garden centre; they took the trouble to make a special label with the name Paper Lantern, but the picture, maybe some kind of Italian long sweet pepper, is almost as far from a paper lantern as you could possibly get. How misleading for new chilli growers is that?

2016-04-08-11.03.46.jpg.jpeg

For anyone interested in what a paper lantern really looks like, here is a picture of one.

Paper Lantern Cropped


Overwintering Chilli Plants – Some practical examples

The overwintering of chilli plants, in temperate areas anyway, is probably the most variable and uncertain part of chilli growing. The most detailed advice is, at best, to be taken with a pinch of salt as there are so many more variables to think about when you compare overwintering with, say, germination. How warm is the autumn? how cold is the winter? where are they kept? what variety? How long are the daylight hours?

So rather than dispensing general advice, which I, and many others have done before, I will illustrate some practical examples of what has happened to some of my experimental plants this winter. For a little bit about what happened to some of my plants back in the autumn you can link to the blog entry ‘When Will My Chilli Plants Die?’.

Where I live near the coast of  south Devon in the UK, we have had what is, so far, undoubtedly the mildest winter ever, so I still have a few plants that would not normally survive. This is as good as it gets, and things haven’t been great, so this illustrates the general advice that you should bring any plants that you want to keep into the house where they stand a very good chance of survival. The hardier of my plants were busy fruiting in my greenhouse until Christmas. Up until that point we had only two mornings when there was frost on the ground, and even then the greenhouse temperature only dropped to 3c. Often temperatures were 15 or 16°C and not far of that at night times. It was really really dull and wet though, so I wasn’t hopeful for some plants that I left outside.

Through January temperatures were still warm, and it is only in the last couple of weeks that we have had consistently lower temperatures, but still the greenhouse hasn’t dropped to lower than 1°C.

Despite the warm early winter I am still not surprised to see that most of the plants I tried to overwinter in the greenhouse or outside are looking doomed. There are a few which will survive, but 4 months of short days and just a couple of months of cool temperatures have still mounted up so that only the real hardy ones will live on.


Rocoto, overwintered in cool greenhouse

Rocoto, overwintered in cool greenhouse, pretty good.

I had little doubt that this rocoto would survive, they are pretty hardy and this one wasn’t pruned back till January, and at the end of February it is still looking nice and green. It is in a smallish pot in the greenhouse.


Rocoto overwintered in vegetable patch. Very dead!

This rocoto, above, wasn’t as lucky. It was very much an experiment, it grew well outside in a vegetable patch protected by climbing beans all around, but the wet soil and a battering by the wind means it is unlikely to shoot out again this year.


Rocoto overwintered outdoors in pot,

Rocoto overwintered outdoors in pot.

This 3rd rocoto was overwintered outside the greenhouse in a large pot, it is looking pretty good, the stems all nice and green, the soil drains easily and I hope it will shoot out in the spring. I will move it into a greenhouse to give it a kick start.

Rocotos are generally one of the safest bets when it comes to overwintering. The others that do well are the baccatums, ajis, and some of these have done OK in the greenhouse.


Aji in greenhouse

Aji. overwintered in greenhouse

Aji. overwintered in greenhouse

The botton aji limon is looking green and healthy, but the one above is dead at the main stem, so I am not hopeful for this one, I think the main stem will rot down and cause the plant to die.

Piri piri, overwintered, good and healthy.

Piri piri, overwintered, good and healthy.

Finally, this is one of my old faithful piri piri plants. This is its second winter, it will stand colder than anything thrown at it so far and I am confident it will do well again this year. The stems are still green up to about 1m high and I have only pruned the straggly small stems to keep it in shape. It is in a big pot, which keeps the roots insulated against sudden drops in temperature, and it is under glass.

I started off hanging on to other plants, either to see which was the first to go, or to test out some new ones. I have never overwintered Carolina reaper before, so I tried that. In the house is OK, but a couple in the greenhouse died back quite quickly. Likewise various annuums they didn’t do well in the greenhouse either and are already in the bin. I wouldn’t normally try keeping these anyway, things like jalapenos don’t perform as well in their second year as newly seeded ones, but as October and November were so mild I hung onto a few.

This last one was an annuum that I did secretly hope would survive, as it would have been great to see it shoot out early. It is a pimento de Padron, and was nearly 2m high in a greenhouse bed, but I’m not sure if it will grow again, watch this space.

Pimiento de Padron overwintered in a greenhouse bed

Pimiento de Padron overwintered in a greenhouse bed


Hoverfly laying eggs on a chilli plant

Hoverflies, Predators of Greenfly

The most commonly talked about predator of greenfly is ladybirds, you can buy them online, or collect them from around the garden, often on stinging nettles, which are themselves riddled with greenfly.

Just as effective, and just as common, if not more so, are hoverflies. The flies themselves usually feed off of plant nectar, but the larvae of many hoverfly species feed on greenfly along with other aphids, thrips and any other small insect they can get their teeth into.

I have a few more greenfly than usual in the greenhouse this year, but today I noticed that the battle has turned against them. I have left the doors wide open in the last few days in the hope that some predators might come in, even at night, which means I risk moths coming in, and that means caterpillars. Sometimes the line between good and bad is a fine one.

I discovered a new way of finding greenfly, just watch where the hover flies go. I have never watched them this closely before.

Update – For a bit more on greenfly detection have a look at this later blog entry.

Hoverfly laying eggs on a chilli plant

Hoverfly on chilli plant

This chappy (chappess actually) hovered around the plants from shoot to shoot, only stopping at the ones which had greenfly in the tips.Here you can see her sucking on a leaf, maybe one that is covered with the sweet sticky dew that the greenfly exude, this is also the stuff that ants love. I couldn’t get a picture of her next move, which was to reach in with her back end and lay an egg among the greenfly. One egg laid, then on to the next shoot. Only the shoots with a greenfly benefited from an egg, so hopefully in a day or two a tiny larvae will emerge on each and start munching. They grow quite quickly so in a few days I will have a picture of one. Watch this space.

Greenfly on Chilli Flower

Hidden Greenfly Damage

Most people know the common reasons why we shouldn’t let greenfly run amok over our chilli plants, they suck it dry of sap and nutrients and they spread disease. One other big problem with greenfly is that they ruin fruit. Malformed fruit is a fairly common problem on chillies and other factors come into play such as environmental conditions, genetics, and diseases, but problems resulting from greenfly damage are often not credited as such because they occur long after the greenfly have gone.


Greenfly on Chilli Flower

Greenfly on chilli flower

The above picture shows how they enjoy getting their beaks into the soft flesh of a flower, often the flowers and new shoots are the first parts of a plant to be attacked because they are the most tender and succulent. Once this flower opens they will get inside and feed of the reproductive parts of the plant and the tiny chilli before it has even developed. This results in scar tissue from where they pierced the flesh and the outcome is a chilli that is split, or misshaped. You can see this in the picture below.

Greenfly damaged Chilihuacle Negro Chilli

Greenfly damaged Chilihuacle Negro Chilli


Now the Chilhuacle Negro is an odd chilli anyway, the skin is always matt coloured and leathery, even when it is fully ripe (when it turns brown) and it is never smooth and round, but you can see here that secondary fruits have formed close to the calyx (where it joins the stem). On the right hand one these aren’t even closed, they are split open and you can see inside. Whilst still edible, this will probably start to rot before it ripens, and if you were a commercial farmer it certainly wouldn’t be of a quality that you could sell.

The answer to this problem is that as soon as you see evidence of greenfly, usually the feathery white skins on the leaves below, check your flowers. It is difficult to get at the greenfly inside and crush them without damaging the flowers, so you can use an organic spray, but I think it is best to nip off the flowers while they are young so the plant doesn’t waste its resources growing useless fruit. It will soon grow more flowers,usually they produce many more flowers than fruit anyway, and it ensures you get rid of your greenfly and leave the plant producing a healthy crop.

I have had more problems than usual with greenfly this year, but as documented in a previous blog, by far the worst affected have been the Chilhuacle Negros, these fruits must have come from the first flowers be hit, before I even saw them, and I have picked a few fruits like this now. You can never be too diligent!